Starlink can be a major upgrade for a rural home, a job site, a business with limited broadband options, or any property that needs a reliable secondary internet connection. But the equipment only performs as well as its placement and supporting network allow. To prepare for Starlink installation, start with the property itself: the view of the sky, the route into the building, the mounting surface, and the network that will distribute the connection once it arrives.
A clean installation avoids the common last-minute problems: mounting a dish where trees will block it, drilling before a cable route is planned, or treating the Starlink router as the complete answer for a large home or busy workplace. A little planning turns installation day into a straightforward project rather than a series of compromises.
Start With a Clear View of the Sky
Starlink needs a broad, unobstructed view of the sky to maintain a stable connection. Trees, rooflines, chimneys, neighboring buildings, utility structures, and seasonal foliage can all create interruptions. A location that looks open from the ground may still have obstructions once the dish is mounted at roof height.
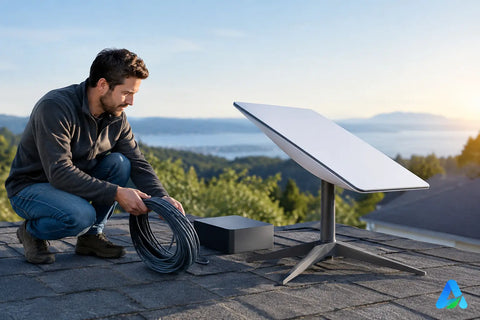
Use the Starlink app's obstruction-checking tool before choosing a mounting location. Walk the property and test likely positions, such as a roof edge, upper wall, pole mount, or elevated structure. Test more than one spot when possible. The best location is not always the closest one to the utility room or office.
For many properties, the trade-off is simple: a higher, clearer mounting point may require more cable routing and labor, but it can prevent performance issues that are difficult to solve later. Avoid planning around a tree that will “probably be fine.” Growth, leaf coverage, and wind movement can change the result over time.
Consider the Site Through Every Season
A clear winter sightline does not guarantee a clear summer sightline. Dense tree canopies are a frequent issue in the Hudson Valley, Connecticut, and other heavily wooded areas. Snow accumulation, ice exposure, coastal wind, and extreme sun should also influence the mounting choice.
The goal is a location that remains open and accessible enough for service without placing the equipment where weather exposure or landscaping will become a recurring problem.
Choose the Right Mounting Surface
The ideal mount depends on the building, roof material, dish location, and local conditions. A temporary ground-level setup can be useful for testing, but it is rarely the best long-term solution. It is vulnerable to accidental movement, lawn equipment, pets, foot traffic, and lower sightlines.
Roof, wall, fascia, pole, and non-penetrating mounts can all be appropriate in the right setting. What matters is that the selected surface is structurally sound, positioned for a clear sky view, and compatible with the hardware being used. The installation should also protect the building envelope. Every roof or exterior penetration needs proper sealing and weatherproofing.
Do not assume that the nearest roof section is the right roof section. A south-facing area may be convenient, for example, but the obstruction scan and dish orientation should guide the final decision. On commercial buildings, mounting decisions may also need to account for roof warranties, landlord approval, fire-code access paths, and future maintenance.
If the building has a steep roof, fragile roofing material, limited attic access, or a complex exterior finish, professional installation is often the better value. The cost of correcting water intrusion or an improperly secured mount can quickly exceed the cost of doing the work correctly the first time.
Plan the Cable Route Before Anything Is Mounted
The Starlink dish, power equipment, and router need a practical path into the building. This is where clean installations separate themselves from improvised ones. Before install day, identify where the indoor equipment will live and trace the route backward to the exterior mounting location.
Look for a route that keeps the cable protected, discreet, and serviceable. Exterior cable should be secured neatly and kept away from sharp edges, hot mechanical components, moving gates, and areas where it can be snagged. Entry points should be properly sealed to prevent moisture, pests, and drafts.
Inside, avoid running cable across doorways, stairs, or areas where furniture will constantly press against it. A utility room, structured wiring panel, network closet, or dedicated office cabinet is usually a better equipment location than a visible corner of the living room.
Account for Cable Length and Building Construction
Measure the route realistically, including vertical runs, turns, wall cavities, attic sections, and service loops. Do not measure only the straight-line distance. Thick masonry walls, finished basements, concrete slabs, historic construction, and multi-story layouts may require a different routing strategy than a newer wood-frame home.
For offices, restaurants, warehouses, and retail spaces, cable planning should also consider operating hours and customer-facing areas. A route through a ceiling, conduit, riser, or existing low-voltage pathway may preserve a cleaner finished environment and reduce disruption.
Decide Where Your Network Equipment Belongs
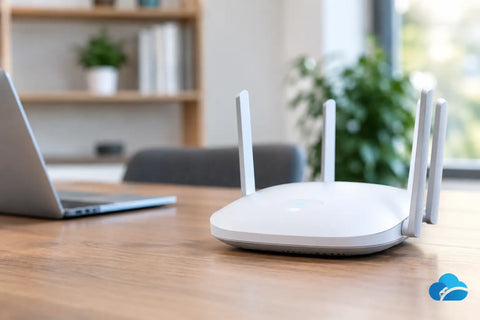
A Starlink connection is only the internet handoff. It does not automatically solve WiFi coverage, wired device connectivity, network security, or network management across a large property. Before installation, decide how Starlink will fit into the rest of the network.
For a small apartment or compact home, the included router may be enough. For a larger residence, detached garage, outdoor living area, home office, or smart-home environment, a professionally designed WiFi system may be the more practical answer. Mesh access points and wired access points are not interchangeable in every situation. Wired backhaul generally provides more consistent coverage where cabling is available.
Businesses should think beyond basic connectivity. Point-of-sale systems, security cameras, door access, guest WiFi, staff devices, VoIP phones, and cloud applications all compete for network capacity. A managed gateway, properly sized switching, segmented networks, and battery backup can help prevent a single internet change from becoming an operational problem.
Starlink can also serve as a failover connection rather than the primary service. This is especially valuable when downtime affects transactions, security monitoring, dispatch, reservations, or remote work. If that is the plan, confirm that the existing router or gateway supports dual-WAN or failover configuration before installation day.
Prepare Power, Protection, and Indoor Conditions
Choose a dry, ventilated location with reliable power for the indoor Starlink equipment. Avoid unfinished spaces that regularly flood, overheat, freeze, or collect excessive dust. Equipment should not be buried behind storage boxes or placed where cords can be pulled loose.
A surge protector is a sensible baseline. For properties where internet availability matters, an uninterruptible power supply can keep network equipment running through brief outages and can provide time for an orderly shutdown during a longer one. Keep expectations realistic: a battery backup will not power a network indefinitely, but it can prevent brief power events from interrupting critical devices.
If the installation includes exterior hardware, proper grounding and surge protection should be evaluated according to the equipment design, local conditions, and applicable electrical requirements. This is particularly relevant in exposed locations, tall structures, and regions with frequent thunderstorms.
Confirm Access, Permissions, and Installation-Day Details
Before work begins, make sure the installer can access the necessary areas: roof access points, attic hatches, utility rooms, network closets, and exterior gates. Move vehicles, patio furniture, stored materials, and other obstacles away from the work zone.
Homeowners in an HOA or condominium should confirm mounting rules before scheduling. Renters need property-owner approval. Commercial tenants may need written permission from the landlord or property manager, particularly for roof penetrations, exterior conduits, and shared telecommunications spaces.
It also helps to document what matters most before the appointment. Is the priority the cleanest possible cable concealment, the strongest available signal, a temporary setup for a construction project, or integration with an existing UniFi network and security system? Clear priorities help the installer recommend the right trade-offs rather than making assumptions at the job site.
Know When Professional Design Makes Sense
A basic Starlink setup can be manageable for a simple property with an open sky view and a short cable run. The project becomes more involved when it includes high mounting locations, difficult roof access, multiple buildings, long cable pathways, dense landscaping, complex WiFi needs, or business-critical connectivity.
Wall Street Networks can assess the full system, not just the dish location: mounting, low-voltage pathways, WiFi coverage, switching, backup internet, surveillance, and network organization. That approach is useful when Starlink needs to support a polished home environment or a business that cannot afford a patchwork installation.
The best preparation is not buying more equipment than you need. It is making a few informed decisions before the first hole is drilled: where the dish can see the sky, how the cable enters the building, where the network belongs, and what level of reliability the property actually requires. Get those details right, and Starlink becomes a dependable part of the larger system instead of another box of technology asking to be managed.